DYSON AIRWRAP TUTORIAL + REVIEW
Recently, I felt like I needed to change what I was doing with my hair. The process of blow-drying and then styling isn’t for me. I hated hair dryers because they just dried out my hair and I’ve never figured out how to do a proper blowout on myself. It takes too long so I end up going to bed with wet hair and then using my curling wand in the morning. It has not been the best strategy.
I’ve been doing this for years and have been thinking there has to be a better way of doing my hair…
About a month ago, I got the Dyson Airwrap and it changed everything!
I’m so excited about this product so I want to share my review of the Dyson Airwrap and my tips on how to use it:
My first impression when I opened the Dyson Airwrap was that every detail was perfect. The packaging, the storage case, and the tool itself. You can see and feel the quality of this product.
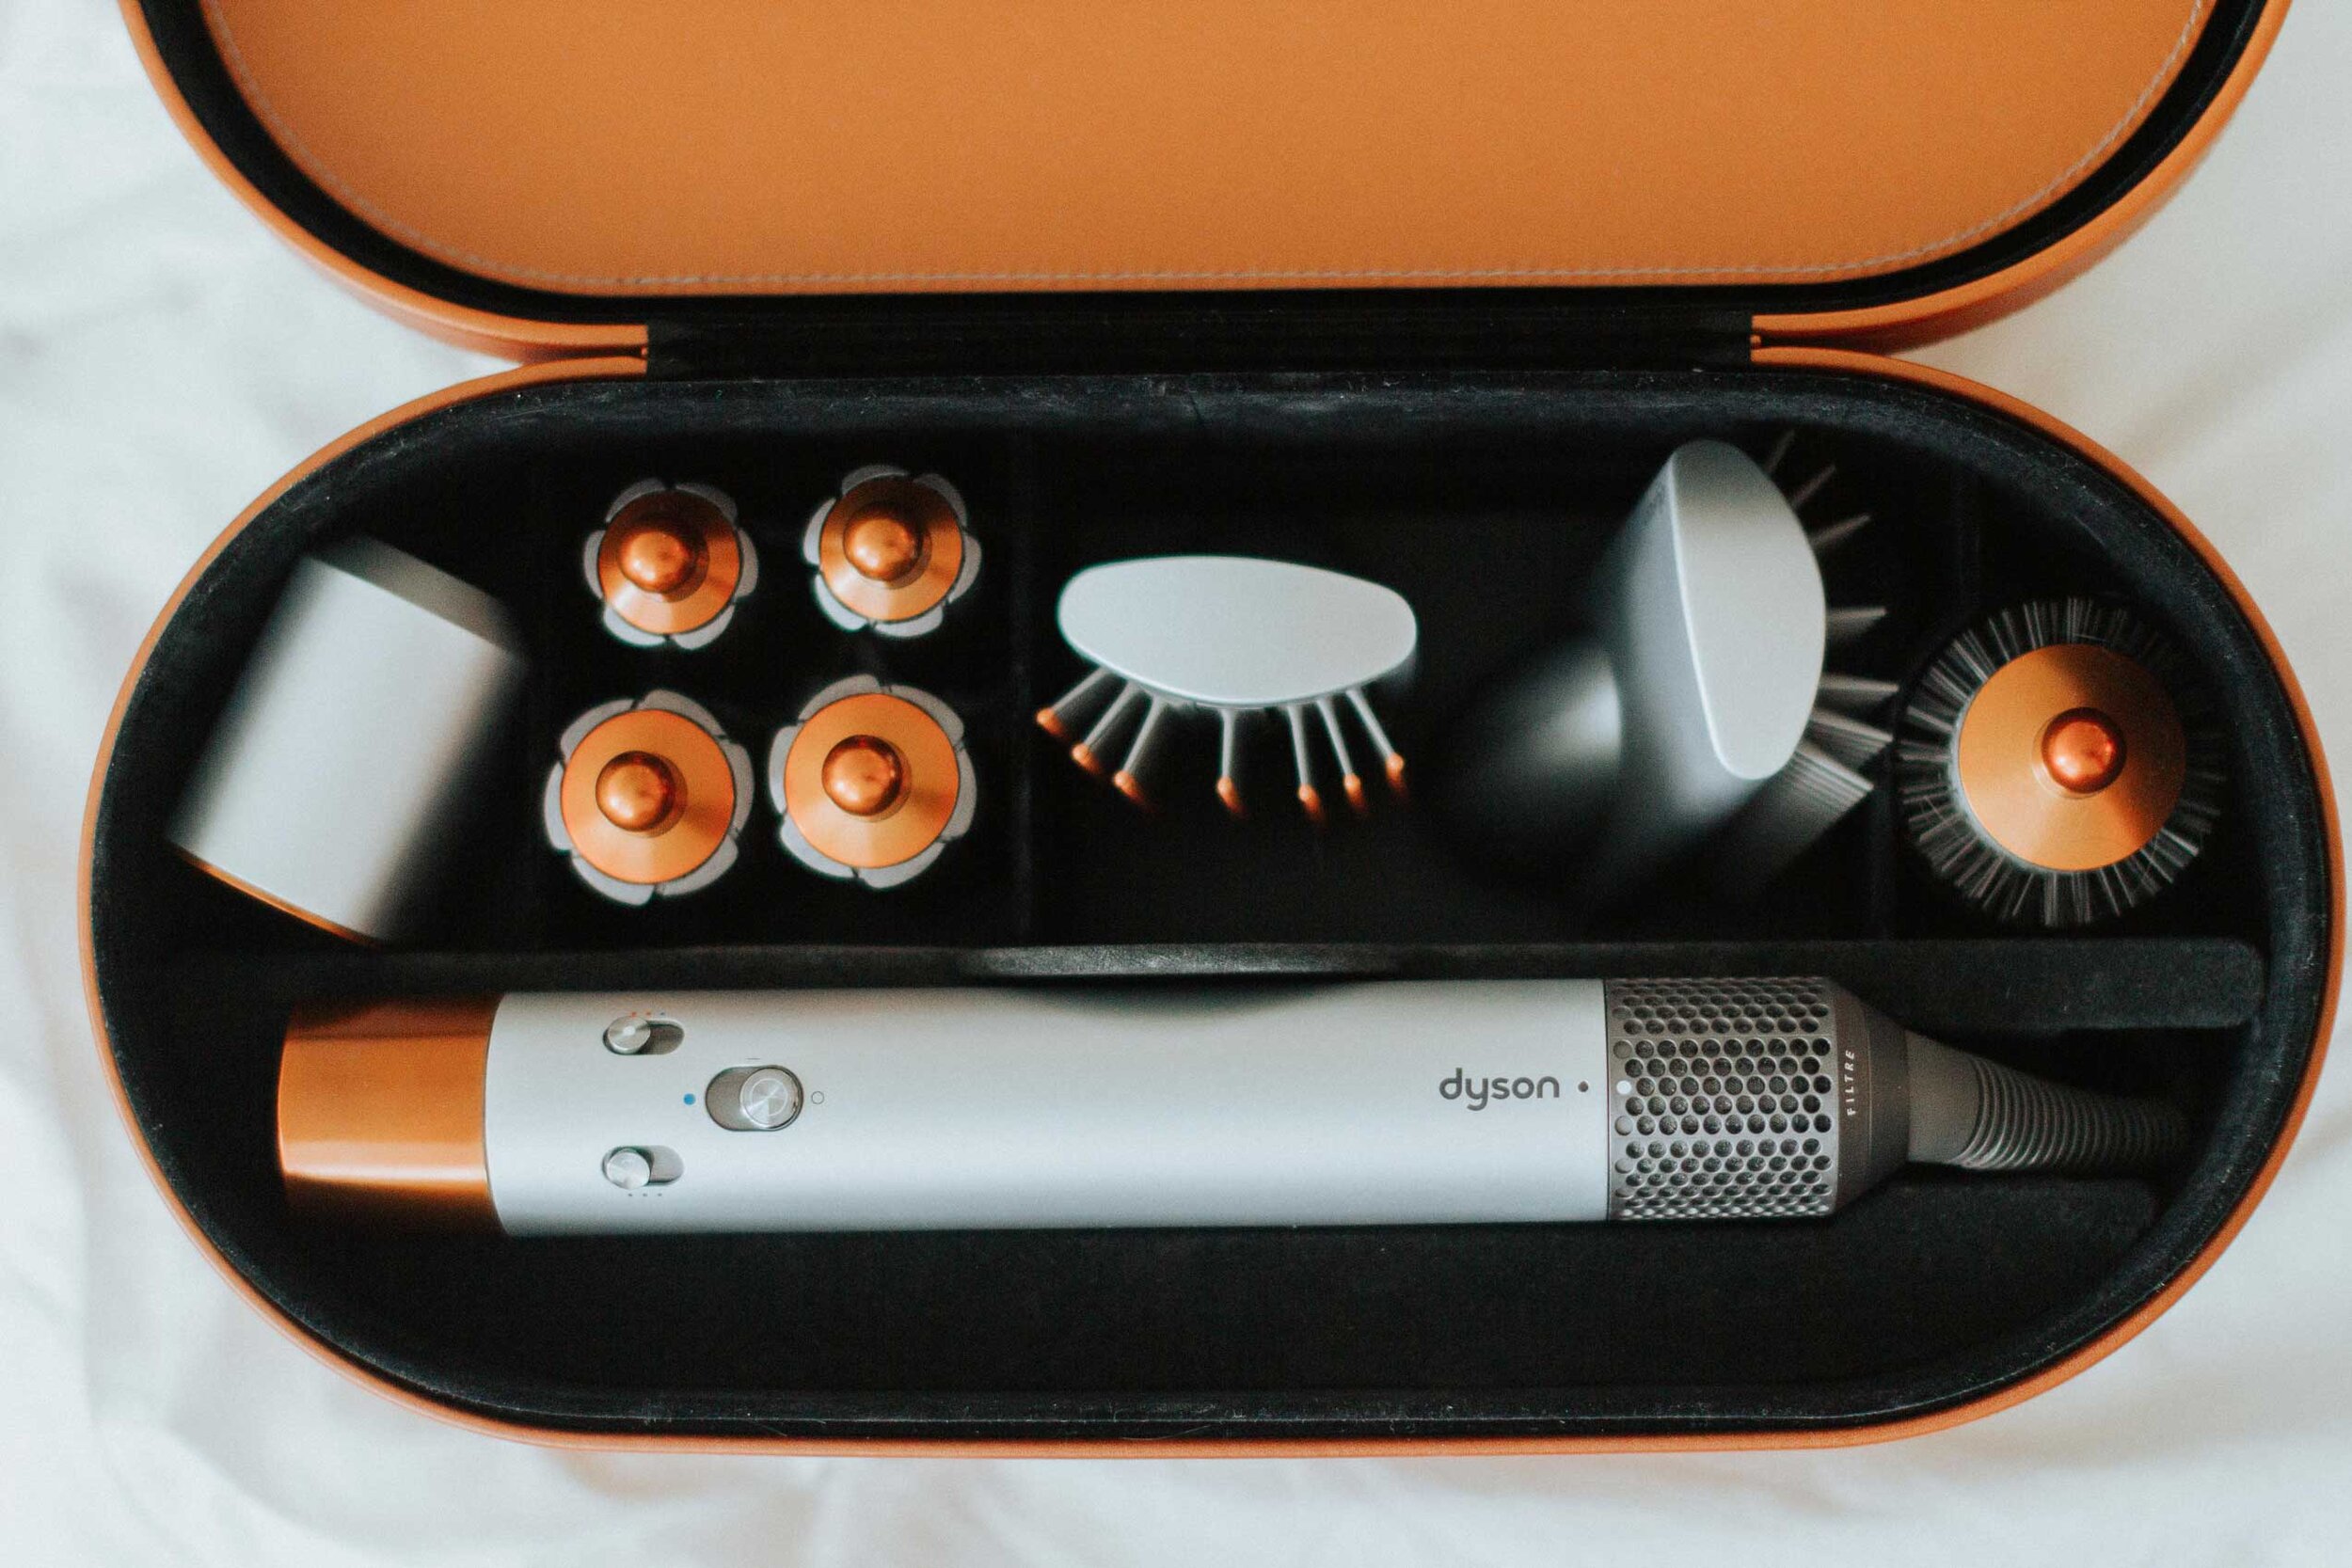
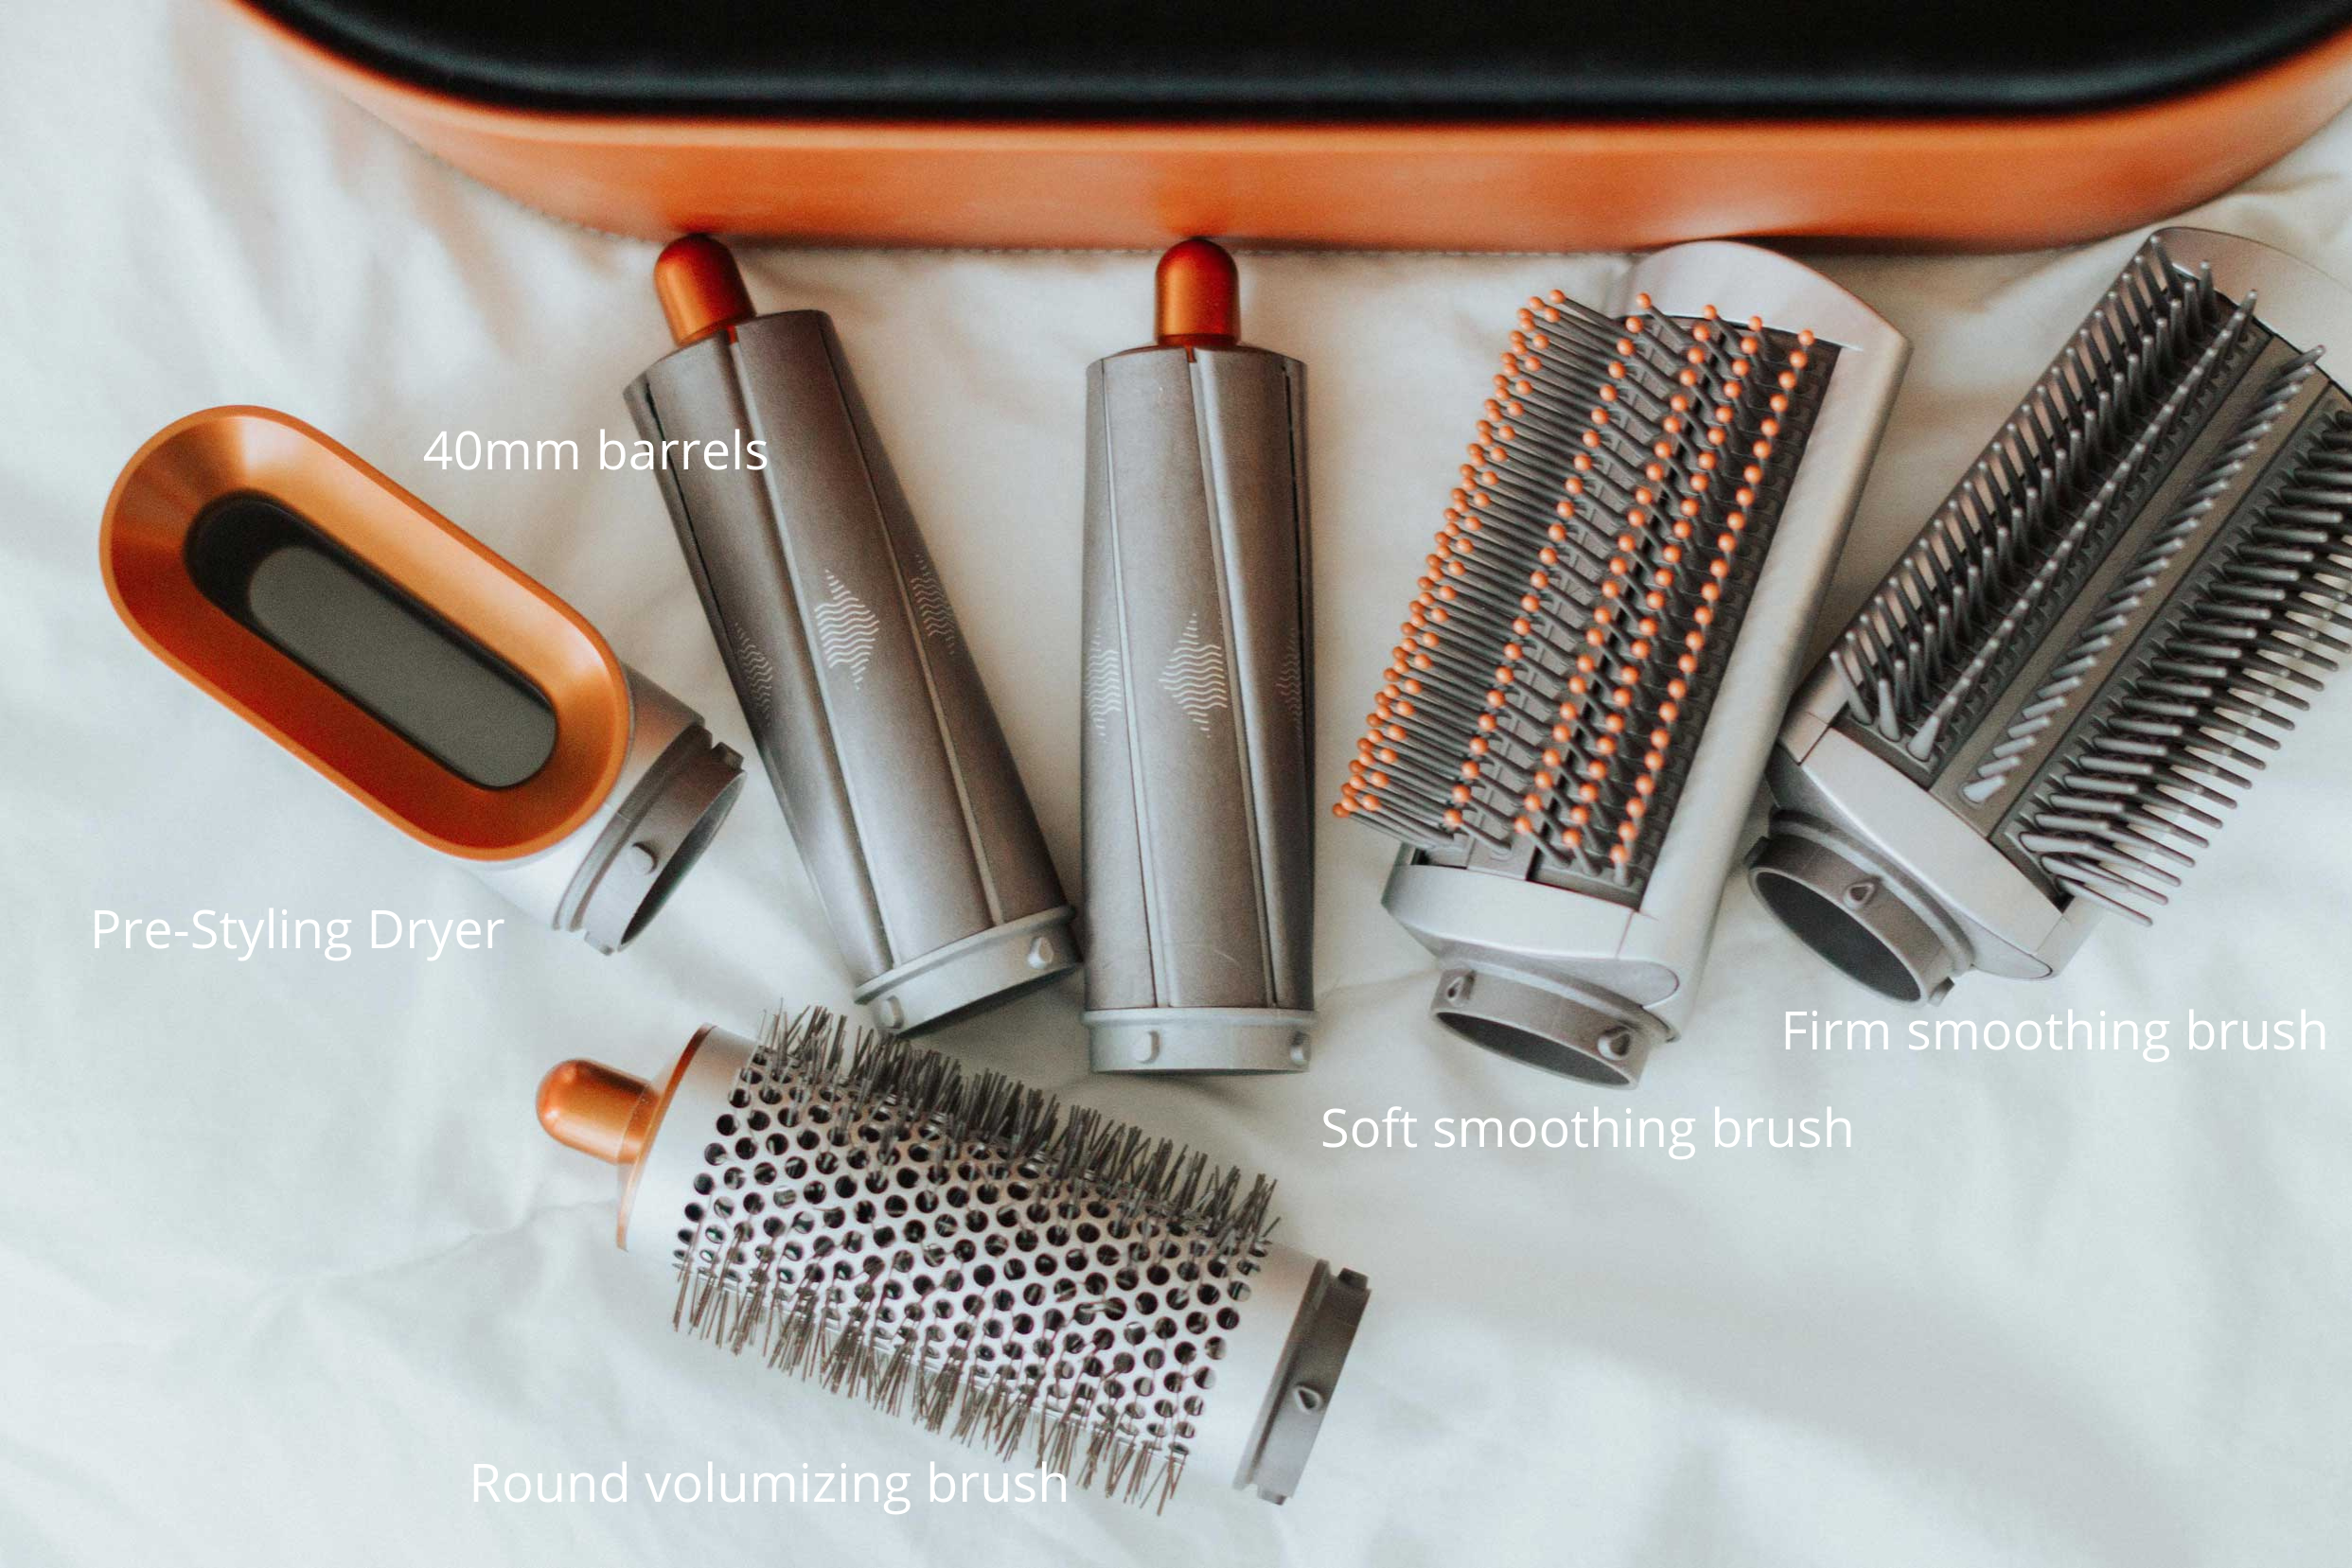
In the box you get:
the Airwrap styler,
30mm & 40mm Airwrap barrels,
firm & soft smoothing brushes,
a round volumizing brush,
a pre-styling dryer,
non-slip mat,
filter cleaning brush,
a storage case to put it all in
and a travel bag.
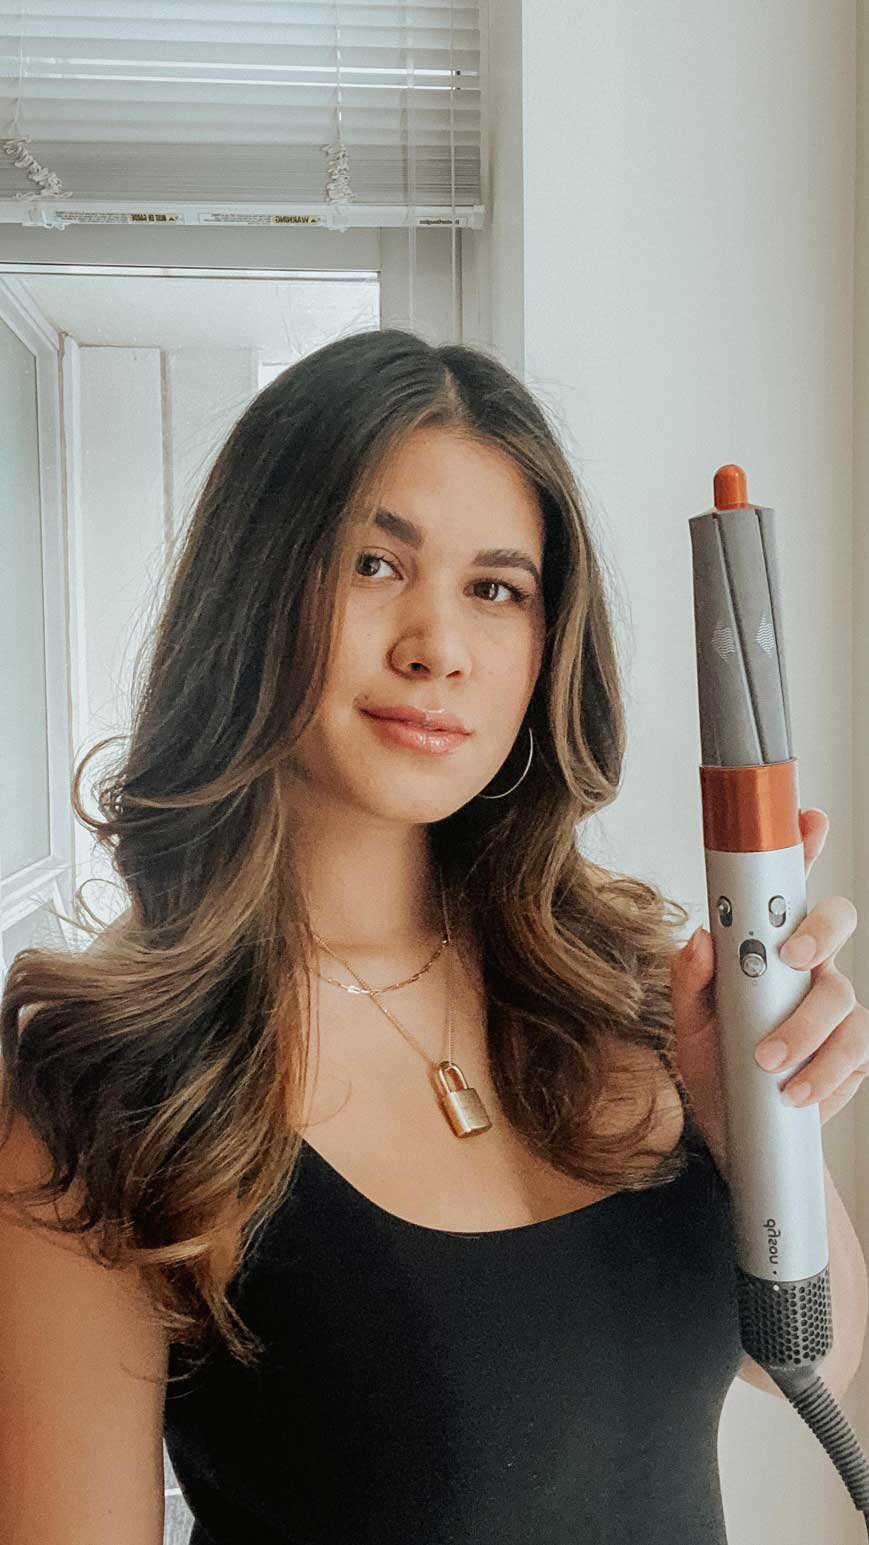
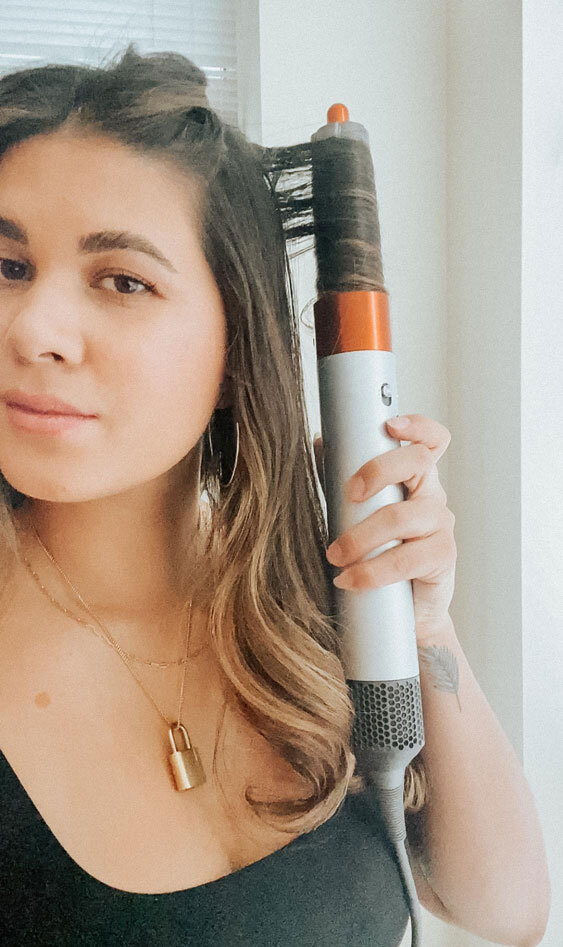
I have the holiday edition which came in this beautiful copper colour.
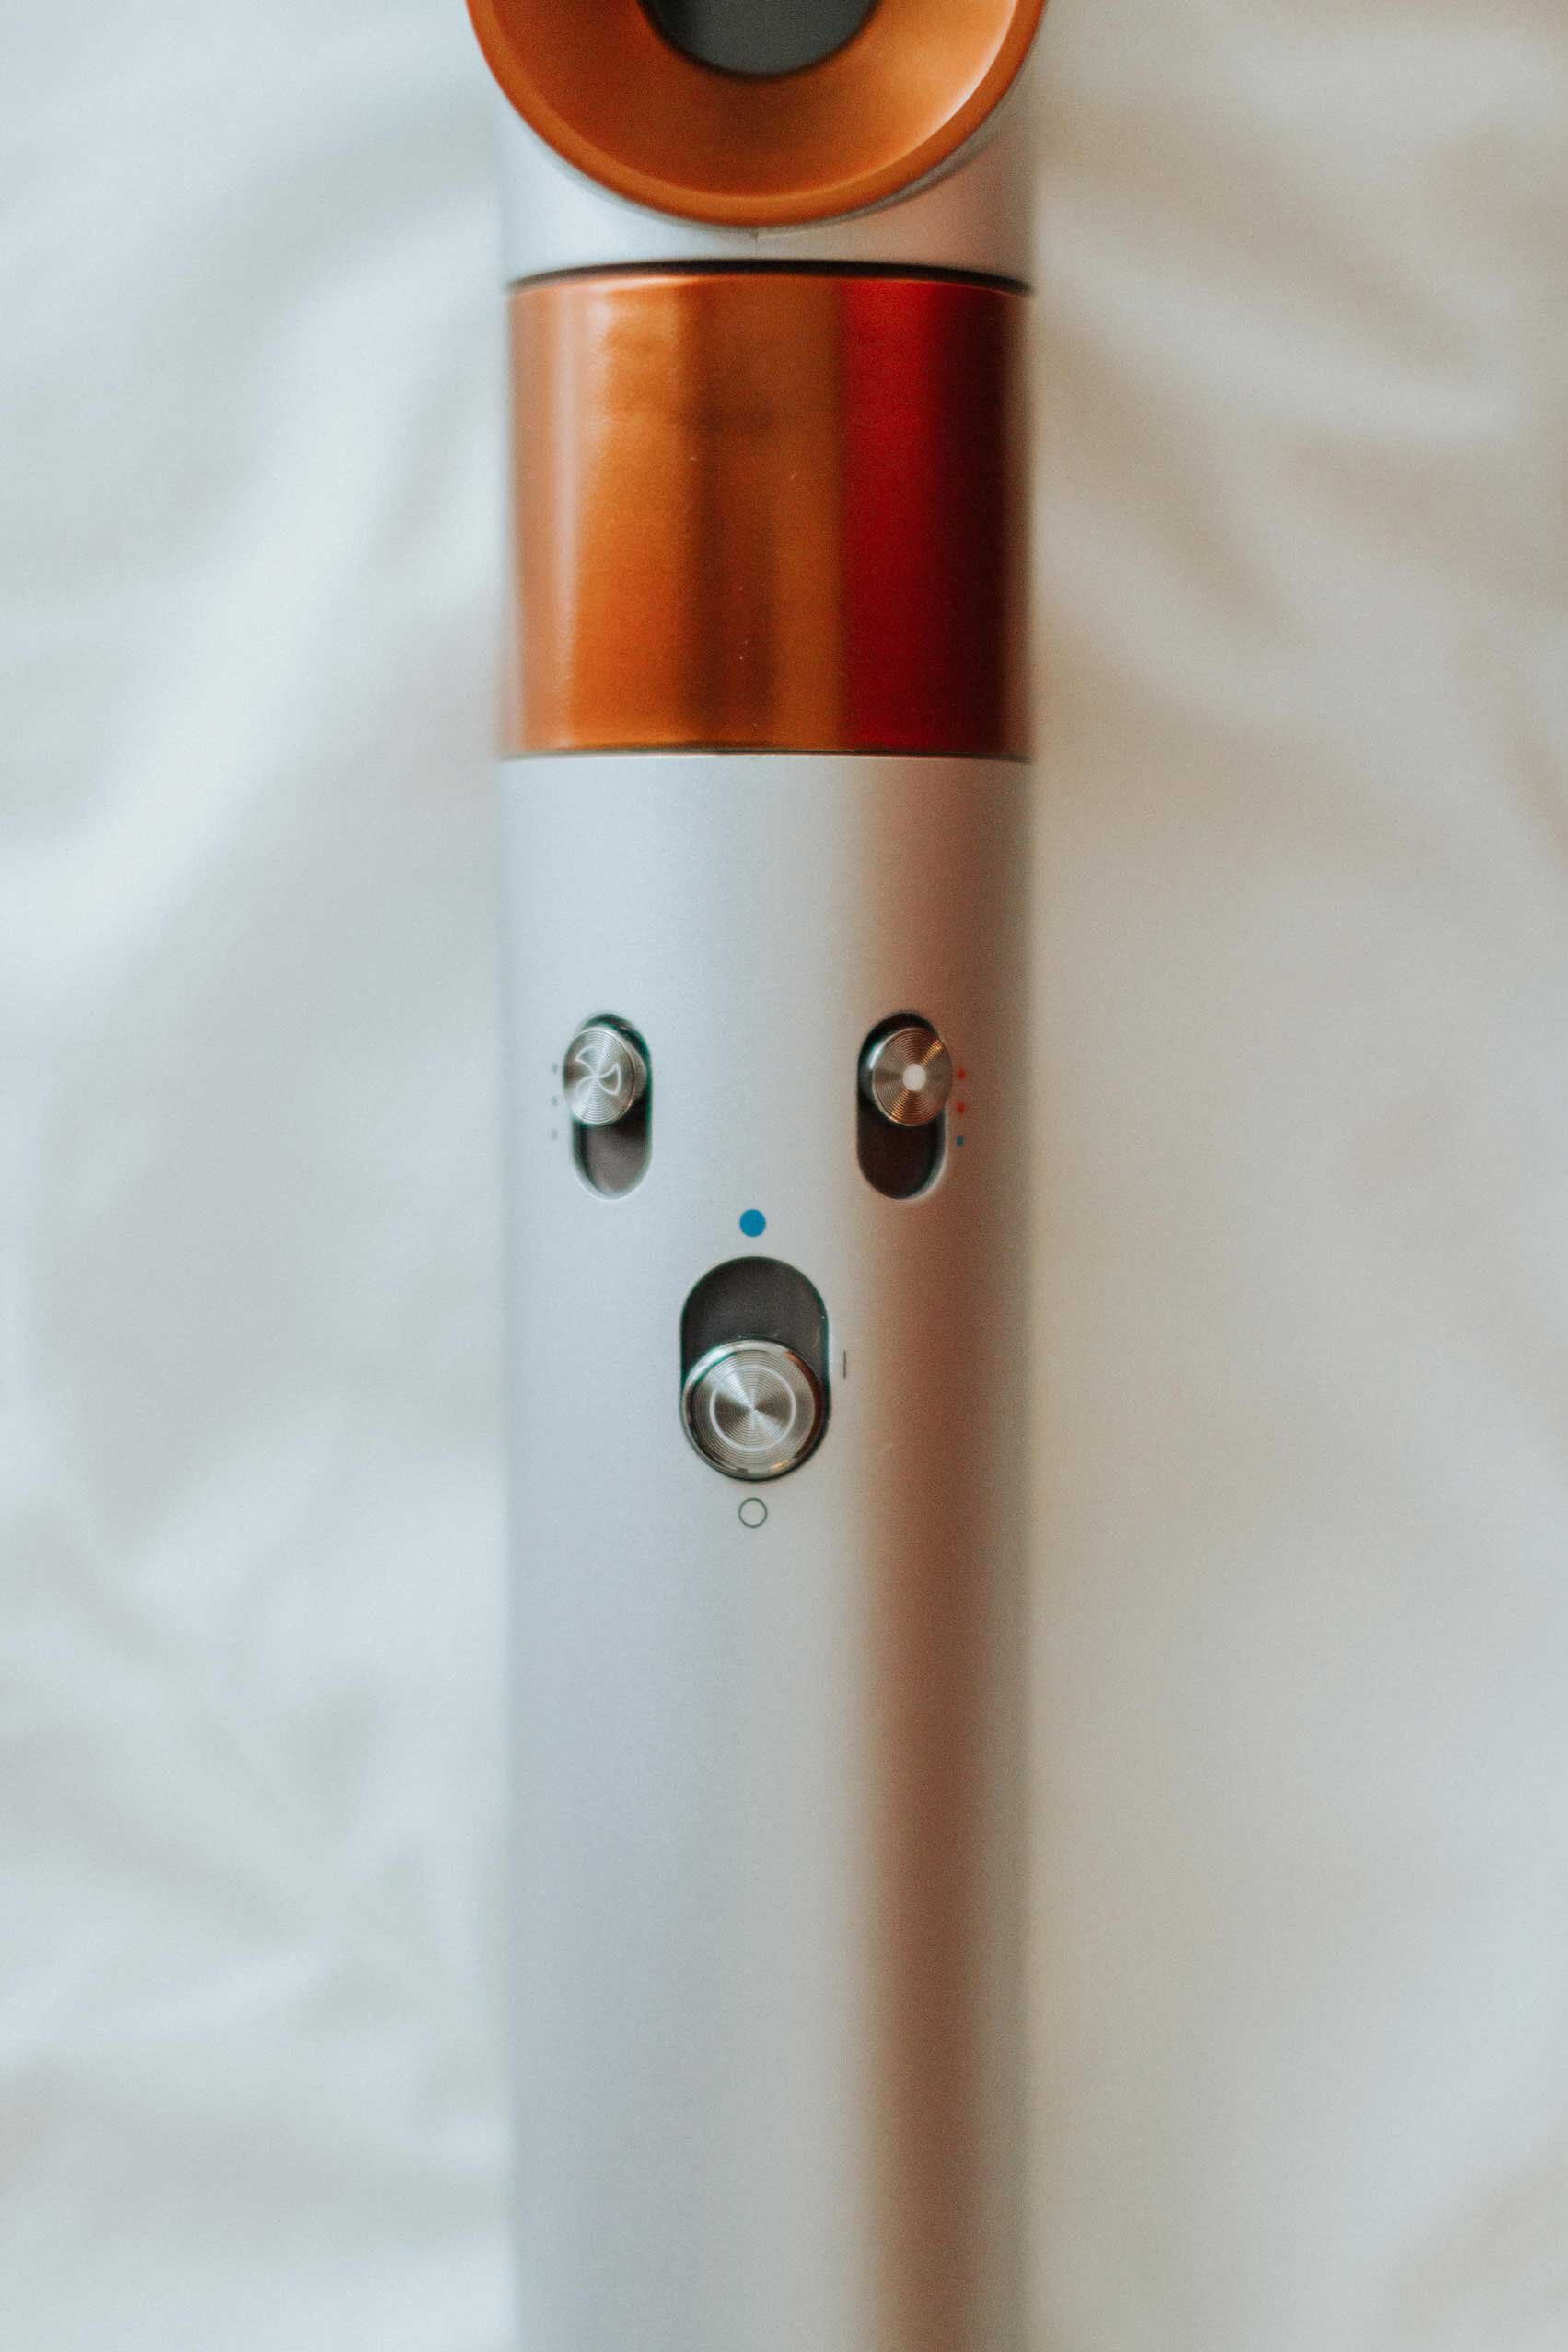
So how does it work? On the styler (the part that you hold), there is a power button with a cool-shot setting, two heat settings and one cool setting, and three levels of airflow. It uses the Coanda effect to curve the airflow which wraps your hair around so it’s both drying and styling simultaneously. This technique makes it so that it doesn’t need extreme heat to style.
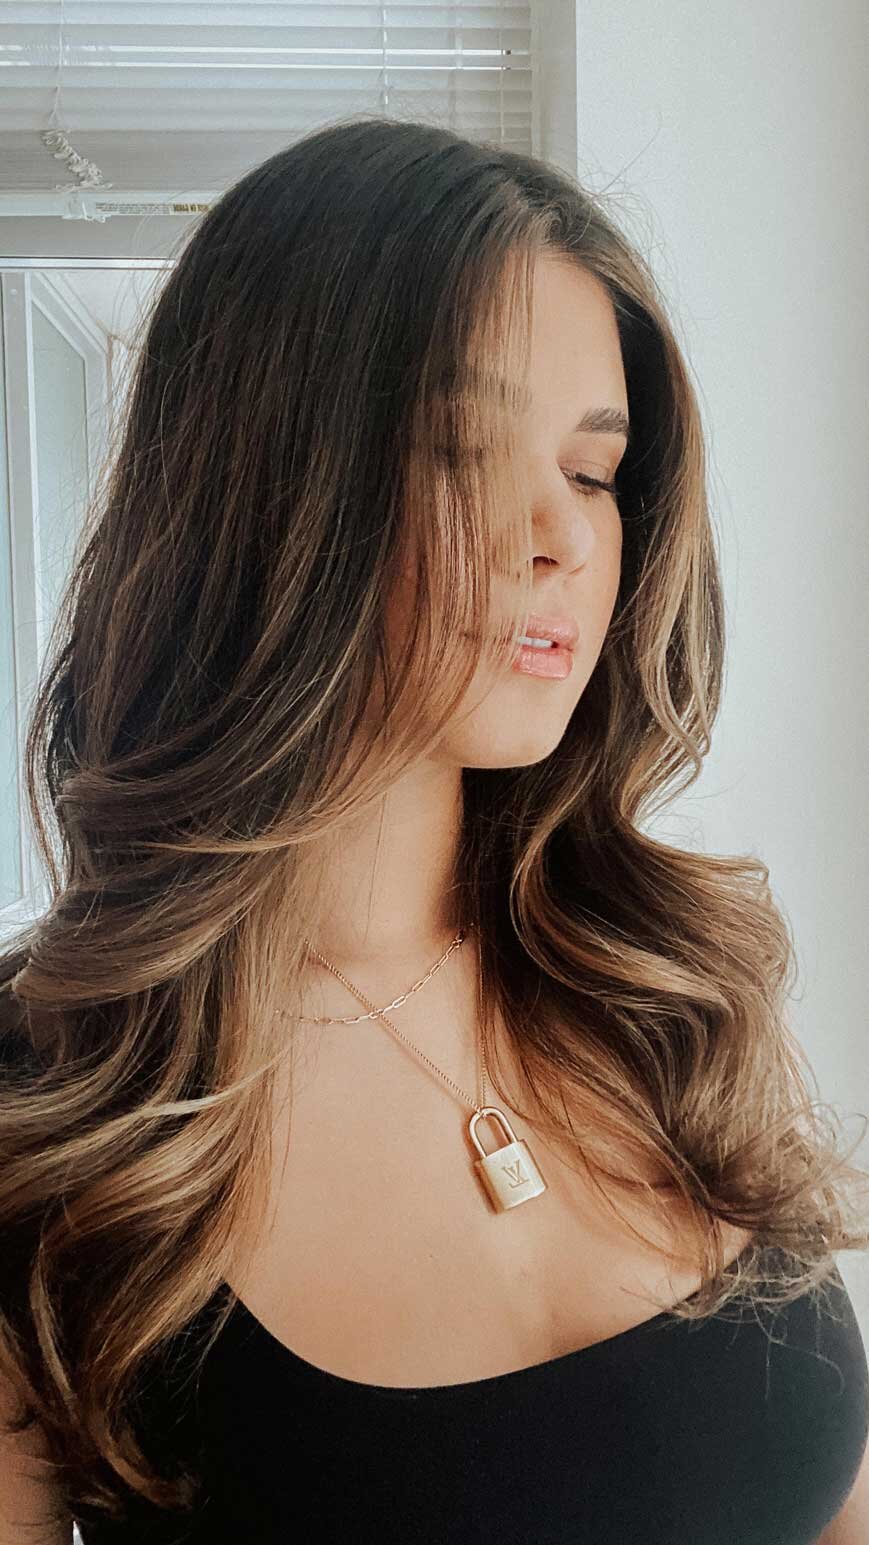
I have a slightly more coarse and thicker hair type so I typically need a bit more heat. I always use the highest heat and air settings also because I want my hairstyle to last a long time. Even on the highest heat, I feel like the Dyson Airwrap doesn’t damage my hair as much as other heat products would. The part that I like the most is that it dries and styles at the same time, saving me SO much time. Plus, I think that the combination of the air while styling gives my hair soooo much volume. I’m not sure which part of it makes my hair look way smoother, but it’s seriously like magic. It also makes the whole experience of doing my hair so much fun!
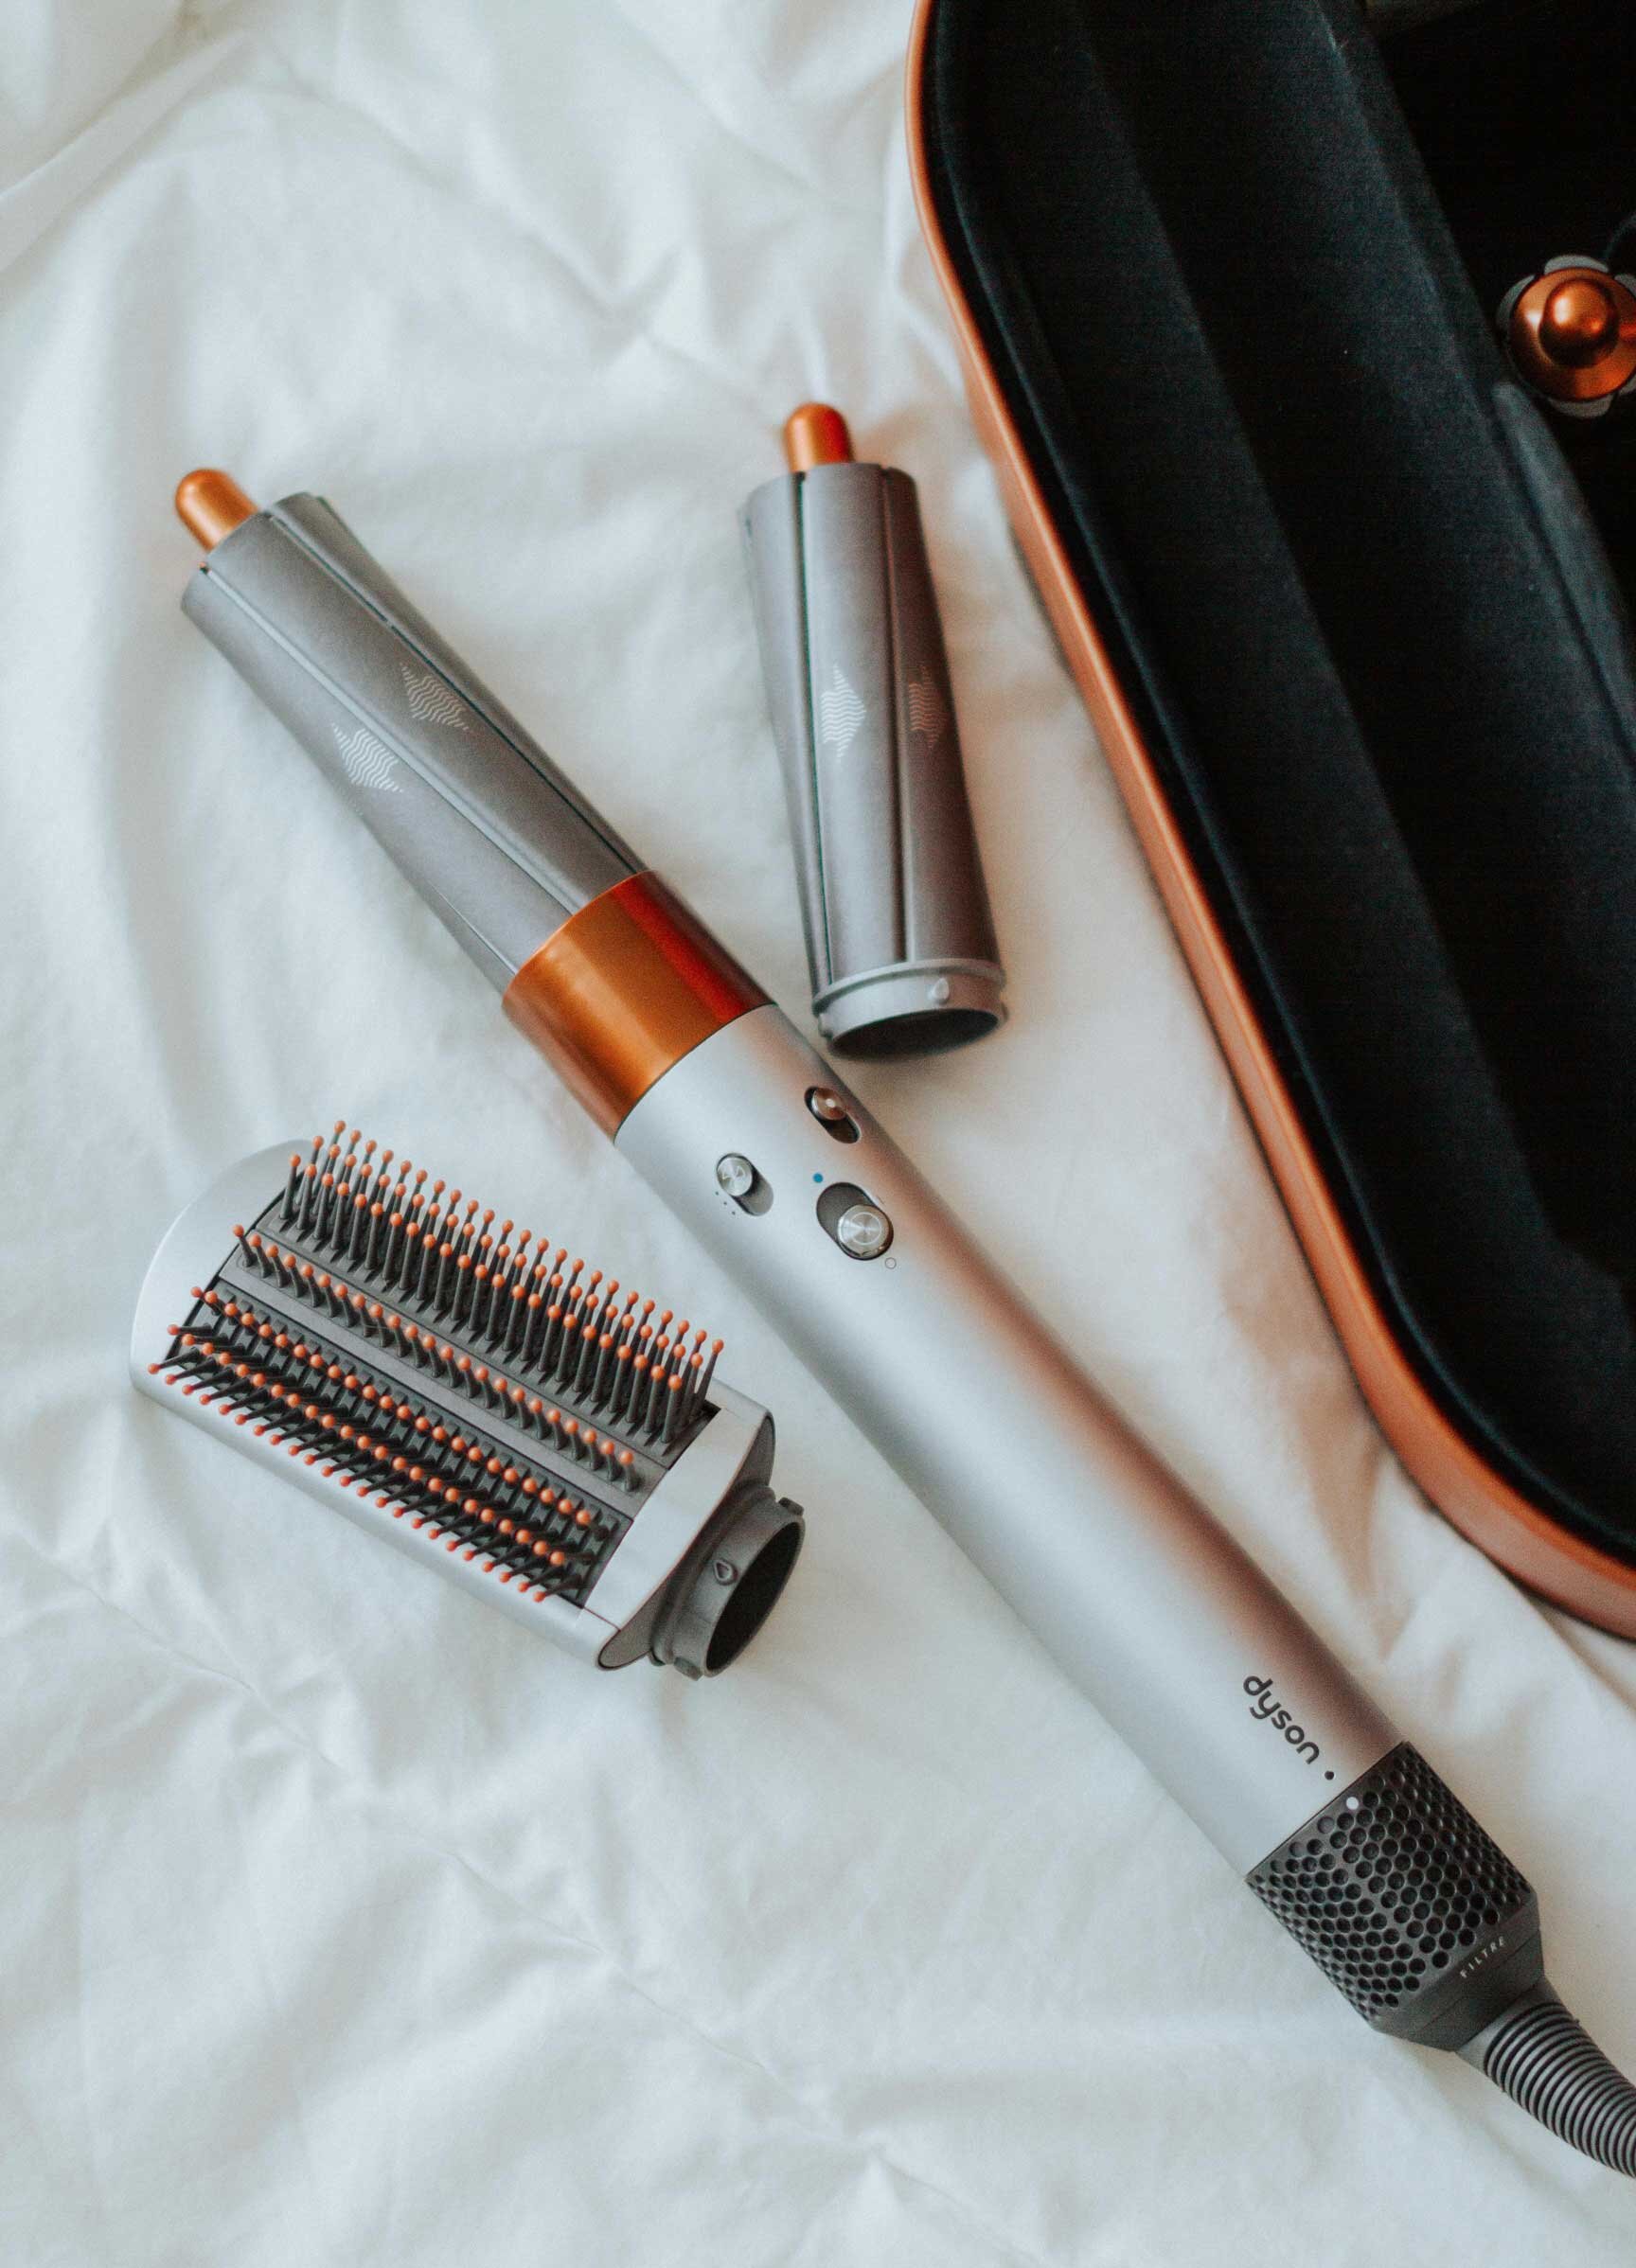
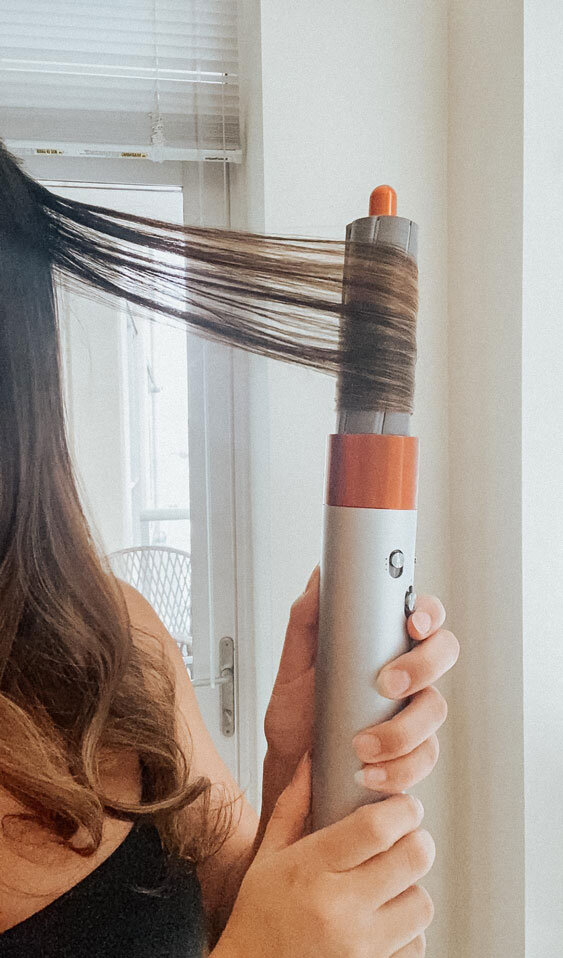
My favourite attachments are the 40mm barrels, I love having my hair curled, and the soft smoothing brush. I think the smoothing brush works similar to those Revlon heat brushes that everyone has been getting.
My first couple of times using the Dyson Airwrap weren’t that successful. It does take some getting used to, so I wanted to give you some tips on how to use the Dyson Airwrap (keep scrolling if you only want to see the pros/cons and if it’s worth the money):
The Dyson Airwrap still uses heat so I would recommend using a heat protectant.
Use the Pre-styler to dry your roots, you won’t be able to get close enough to your roots with some attachments and the attachments can get quite hot.
You want your hair to be about 80% dry, I usually towel dry, go do my makeup, dry my roots and then I’m ready to style it.
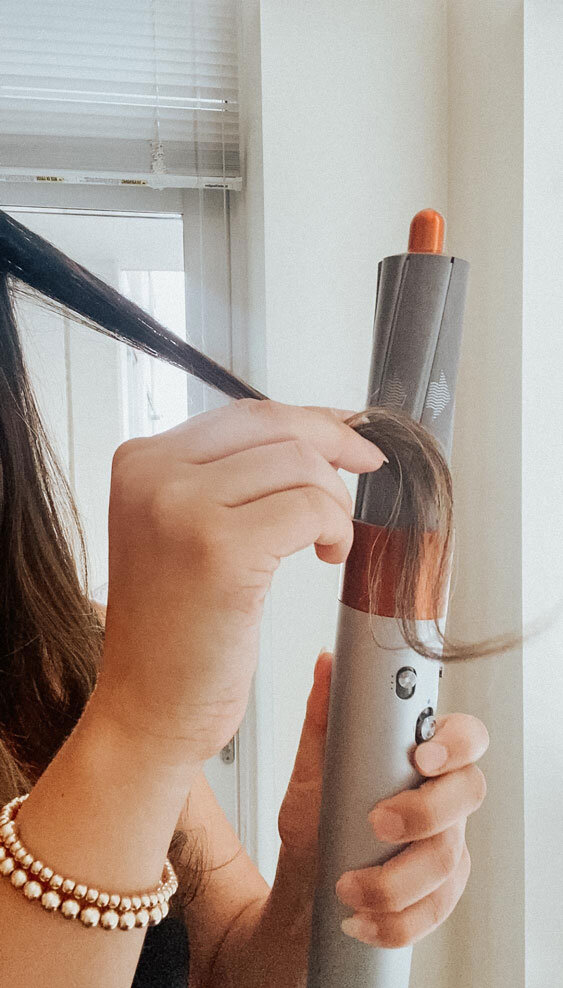
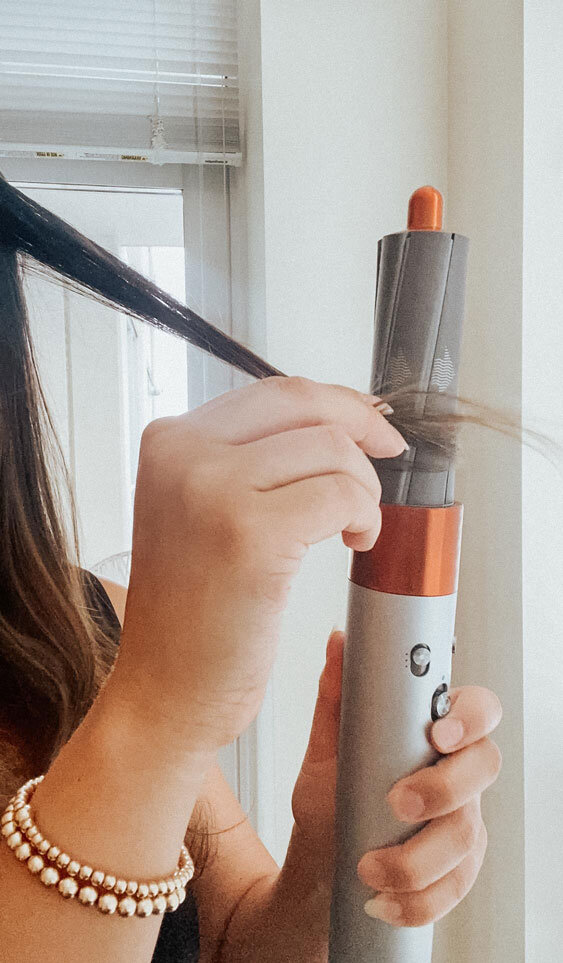
Section your hair and make sure you brush through it first. You want your hair to be smooth, especially with the barrels or else it will get knotted and it could create weird lines.
Take smaller sections than you’re used to when using the barrels. Hold your hair about 3 inches from the bottom, let your ends wrap around the barrel, make sure your hair is wrapped smoothly around and then slowly let it suck up the rest of your hair.
When using the barrels, before you unwrap your hair, turn the Airwrap OFF and then uncurl it or else your hair will fly everywhere.
Okay, so now you know what it’s all about, here are my pros and cons of the Dyson Airwrap:
Pros: My hair feels healthier, smoother and it just looks better overall. When I style my hair using the Airwrap, it will last at least four days, depending on how much I sweat during that time. It saves me time and I enjoy doing my hair now. You don’t need any other tools because this has everything you need. The Dyson Airwrap is the only tool I’ve seen that can actually give you a blowout at home! I get so many compliments when I style my hair with the Airwrap!
Cons: The biggest con is that it’s expensive. The storage box it comes with is stunning but it is quite large and takes up a lot of space. I had to rearrange my entire under-the-sink area to make it fit. The Airwrap itself is also bigger than my previous curling wand. With the attachments, it takes up more room which makes it more difficult to travel with.
So is it worth the money?
For myself, it's 1000% worth it because I love having my hair done and styled often. I also value my time so this makes my schedule and life easier. It’s honestly one of the best things I have owned, I’m so happy that I have it! If you can get it and you see the value in it, I would definitely recommend it. Click here to head to their website and learn more about it!
If it’s not in your budget and you are looking for an alternative, I’ve heard good things about the Revlon Hot Air Brush.
Thanks for reading my Dyson Airwrap Review, hopefully, my tips on how to use it are helpful too! Let me know below if you have any questions or comments.